This GSEB Class 6 Maths Notes Chapter 14 Practical Geometry covers all the important topics and concepts as mentioned in the chapter.
Practical Geometry Class 6 GSEB Notes
Knowledge of Some Important tools and their uses
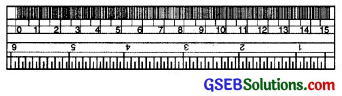
1. The Ruler:
It is a straight strip generally made of wood or plastic. It is graduated into centimetres along one edge and into inches along the other edge. It is used to draw line segments and to measure their lengths.
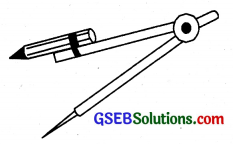
2. The Compass:
It is a V-shaped hinged instrument having a pointer on one end and a pencil on the other. It is used to draw circles and mark off equal lengths.
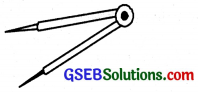
3. The Divider:
Its shape is same as that of a compass but it has pointer on both the ends. It is used to compare the lengths.
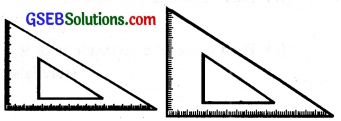
4. Set Squares:
These are right angled triangular plates. One of them has the angles 30°, 60°, 90° called 30° set square and the other has the angles 45°, 45°, 90° called 45° set square. Set squares are used to draw perpendiculars, parallel lines and many angles such as 30°, 45°, 60°, 75° etc.
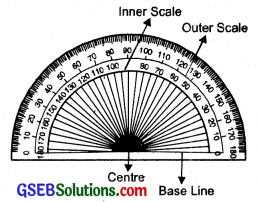
5. The Protractor:
It is a semi circular device graduated into 180 degree-parts. The measure starts from 0° on the right hand side and ends with 180° on the left hand side and vice-versa.
Be Careful While doing Constructions
Here are some tip to help you :
- Use rulers with fine edges and pencil with fine tip.
- Draw thin lines and mark points lightly.
- Keep two pencils in your tool box, one small for the compasses and other drawing lines and marking points.
- The pencil tip and the metal tip oF the Campasses should be at the same level while using the compasses.
![]()
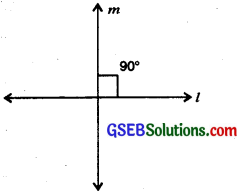
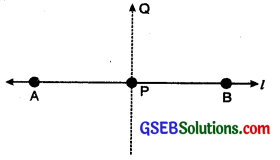
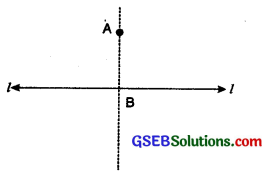
Perpendicular Lines:
Two lines are said to be perpendicular if they intersect each other such that the angles formed between them are right angles.
In figure m is perpendicular to l
Construction of a Perpendicular at a point on the line
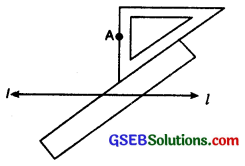
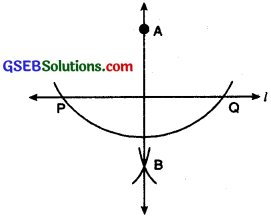
1. To draw a perpendicular to a line through a point on it. (Using ruler and compass):
Step 1. Let P be a given point on the given line l.
![]()
Step 2. With P as centre and any radius, draw an arc cutting the line l at the points A and B.
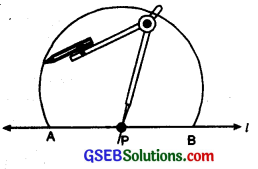
Step 3. With A and B as centres and a radius greater than AP, draw two arcs cutting each other at the point Q.
Step 4. Hold the ruler fixed. Slide the set square along the ruler till the point A touches die other arms of set square.
2. To draw a perpendicular to a line through a point not on It Method using ruler and a set square:
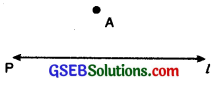
Step 1. Let l be a given line and A be a point outside the line ‘l’.
Step 2. Place a set square on the line ‘l’ such that one arm of the right angle aligns along l.
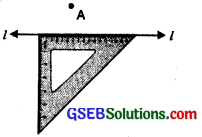
Step 3. Place a ruler along the edge opposite to the right angle.
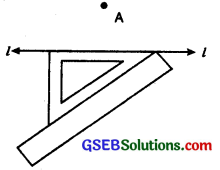
Step 4. Hold the ruler fixed. Slide the set square along the ruler till the point A touches the other arms of set square.
Setp 5. Join AB along the edge through A meeting ‘l’ at B
Now \(\overline{AB}\) ⊥ l.
3. Method using ruler and compass.
Step 1. Given a line ‘l’ and a point A not on it.

Step 2. With A as centre, draw an arc intersecting the line ‘l’ at two points P and Q.
Step 3. With P and Q as centres and same radius, draw two arcs intersecting at the point B say on the other side.

Step 4. Join \(\overline{AB}\) Then AB ⊥ ‘l’
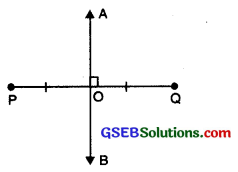
Perpendicular Bisector
A line which is perpendicular to a line segment at its mid-point is called perpendicular bisector of that line segment. It is also called the line of symmetry.
In the given figure, line AB is perpendicular bisector of line segment PQ i.e. PO = OQ and ∠BOP = ∠AOQ = 90°.
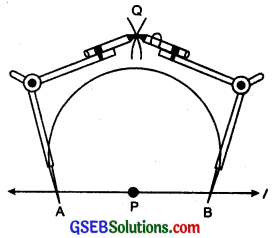
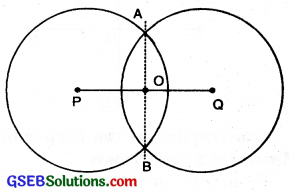
Construction of the Perpendicular Bisector of a line Segment
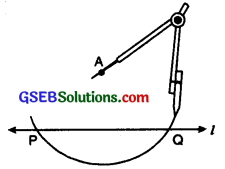
To draw the perpendicular bisector of a given line segment (using ruler and compass):
Step 1. Draw a line segment PQ of any length.
![]()
Step 2. With P as centre and radius more than half of length of \(\overline{PQ}\), draw a circle.
Step 3. Now with Q as centre and same radius, draw another circle. Let it cut the previous circle at A and B.
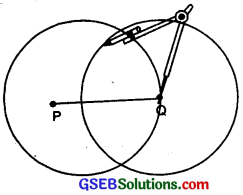
Step 4. Join \(\overline{AB}\) then \(\overline{AB}\) is the perpendicular bisector of PQ.
Circle:
Circle is a closed plane figure consisting of all those points which are at a constant distance from a fixed point.
The fixed point is called centre of the circle and the constant distance is called the radius of the circle.
![]()
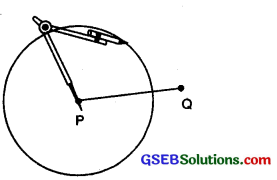
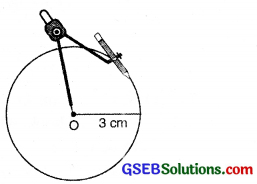
Construction of a circle of a given radius.
Steps of construction.
- Mark a point O on the page of your note book, where a circle is to be drawn.
- Take compasses fixed with sharp pencil and measure the given radius using a scale.
- Without changing the opening of the compasses, keep the needle at point O and draw complete arc by holding the compasses from its knob.
After completing one round we get the required circle.
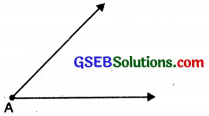
Angles:
An angle is a figure formed by two rays with same initial point.
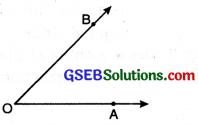
O is the vertex of angle AOB. OA and OB are the two arms of ∠AOB.
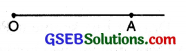
Constructing an angle of a given measure (Using protractor):
Suppose we want to draw an angle of measure 40°.
Step 1. Draw a ray OA.
Step 2. Place the protractor on OA so that the centre of the protractor is on the initial point O of the ray OA.
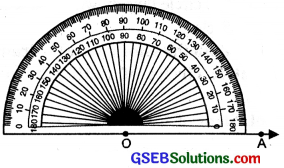
Step 3. Mark a point B on the paper against 40° on the protractor beginning from 0 (zero) on OA.
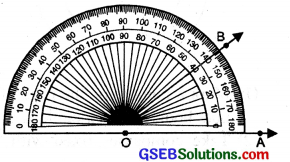
Step 4. Join O and B with the help of ruler. Then ∠AOB is the required angle of 40°.

Constructing an angle equal to a given angle.
Given: An angle ∠ABC.
To construct: An angle equal to ∠ABC. Steps of Construction.
Step 1. Draw a ray OX.
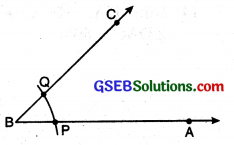
Step 2. With B as centre and suitable radius draw an arc to intersect BA, and BC at P and Q respectively.
Step 3. With O as centre and same radius, draw an arc to intersect OX at R.
Step 4. With R as centre and radius equal to PQ, draw an arc to intersect the first arc at S.
Step 5. Join OS and extend it. Then ∠XOY so obtained is the required angle.
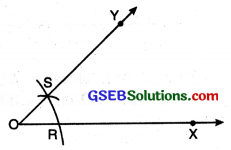
Bisector of an angle (Using ruler and compasses)
Let an angle ∠A be given
Step 1. With A as centre and using compasses, draw an arc which cuts both rays of ∠A at B and C.
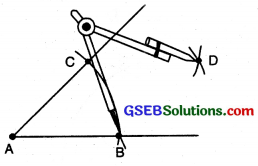
Step 2. With B as centre, draw an arc whose radius is more than half the length of BC.

Step 2. With B as centre and suitable radius draw an arc to intersect BA, and BC at P and Q respectively.
Step 3. With C as centre and same radius, draw another arc cutting the previous arc at D. Join AD. Then AD is the required bisector of ∠A.
![]()
Construction of Angles of Special Measure
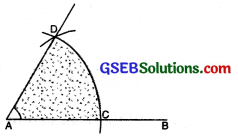
(i) To construct an angle of 60° with ruler and compasses.
Steps of Construction:
![]()
(1) Draw a straight line AB.
(2) With centre A and with any radius, draw an arc to cut AB at
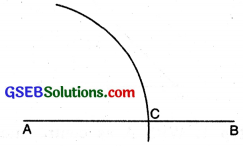
(3) With centre C and with same radius, draw an arc to cut former arc at D.
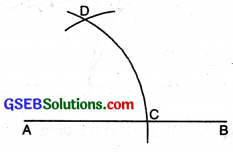
(4) Join DA. Measure ∠DAC. ∠DAC = 60°
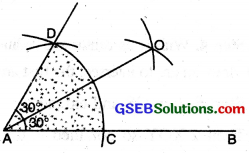
(ii) To construct an angle of 30° with ruler and compass.
Steps of Construction :
(1) Draw a straight line AB.
![]()
(2) With centre A and with any radius, draw an arc to cut AB at C.
(3) With centre C and with the same radius, draw an arc to cut the former arc at D.

(4) Join DA. Measure ∠DAC. ∠DAC = 60°.
(5) Bisect ∠DAC.
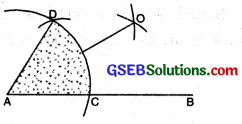
(6) Join AO. Measure ∠DAO and ∠BAO. ∠DAO = ∠BAO = 30°.
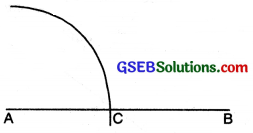
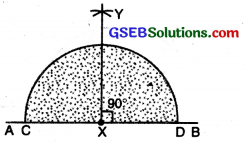
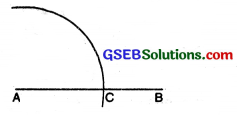
(iii) To construct an angle of 90° with ruler and compasses.
Steps of Construction :
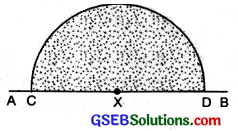
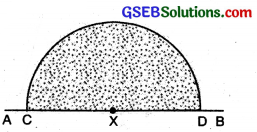
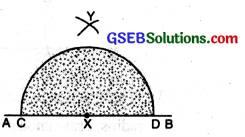
(1) Draw a straight line AB. Mark a point X on it.
![]()
(2) With X as centre and any suitable radius, draw a half circle to cut AB at C and D.
(3) With C and D as centre and radius more than half of CD draw two arcs to cut each other at Y.
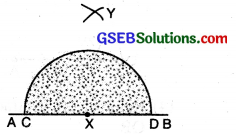
(4) Join XY. Measure ∠YXB = 90°.
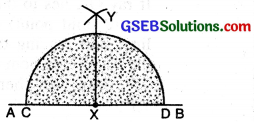
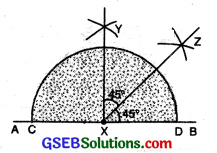
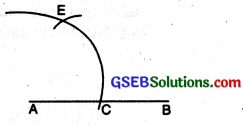
(iv) To construct an angle of 45° with ruler and compasses.
Steps of Construction :
(1) Draw a straight line AB. Mark a point X on it. With X as centre and with any suitable radius, draw a half circle to cut AB at C and D.
(2) With C and D as centre and radius more than half of AB draw two arcs to cut each other at Y.
(3) Join XY. ∠YXB = 90°.
(4) Bisect ∠YXB. ∠BXZ = 45°; ∠YXZ = 45°.
![]()
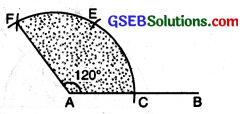
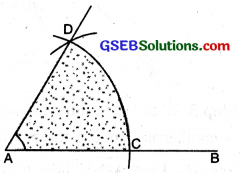
(v) To construct an angle of 120° with ruler and compasses.
Steps of Construction :
(1) Draw a straight line AB. With A as centre and any suitable radius, draw an arc to cut AB at C.
(2) With C as centre and with the same radius, draw an arc to cut the former arc at E.
(3) With E as centre and with the same radius, draw another arc to cut the former arc at F.
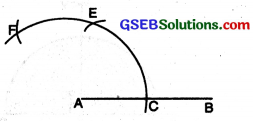
(4) Join AR Measure ∠FAC. ∠FAC = 120°.