This GSEB Class 7 Maths Notes Chapter 15 Visualising Solid Shapes covers all the important topics and concepts as mentioned in the chapter.
Visualising Solid Shapes Class 7 GSEB Notes
Plane Figures:
The circle, the square, the rectangle, the quadrilateral and the triangle are examples of plane figure. These figures have two dimensions namely length and breadth and can be drawn on paper.
Plane figures are of two dimensions (2-D).
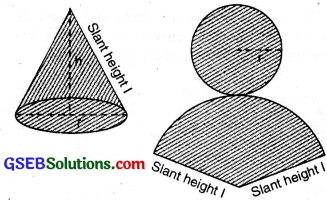
Solid Shapes:
The cube, the cuboid, the sphere, the cylinder, the cone and the pyramid are the examples of Solid Shapes. The solid shapes are of three-dimensions (3-D). Three dimensional objects is that they all have some
length, breadth and height or depth. That is, they all occupy space and have definite shape.
Faces, Edges And Vertices
The comers of a solid shape are called its vertices, the line segments of its skeleton are its edges; and its flat surface are its faces.
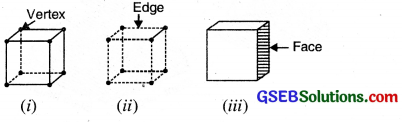
The 8 comers of the cube are its vertices. The 12 line segments that form the skeleton of the cube are its edges. The 6 flat square surfaces that are the skin of the cube are its faces.
Different Solid Shapes and their features:
| Name of the solid | Number of faces | Number of edges | Number of vertices |
| 1. Cuboid | 6 | 12 | 8 |
| 2. Cube | 6 | 12 | 8 |
| 3. Cylinder | 3 | 2 | NIL |
| 4. Cone | 2 | 1 | 1 |
| 5. Sphere | 1 | NIL | NIL |
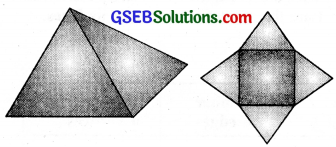
| 6. Triangular pyramid | 4 | 6 | 4 |
Nets for Building 3-D Shapes
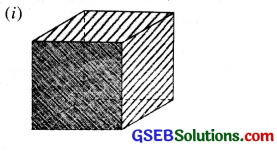
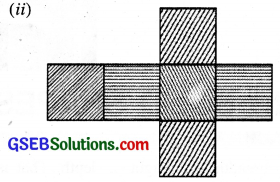
Net is a two dimensional shape that can be folded to form a three dimensional shape or a solid. A solid may have different nets.
The figure (i) Shows a cube and figure (ii) is net of cube.
Similarly, you can get a net tor a cone by cutting a slit along its slant surface.
Net of great pyramid of Egypt which has a square base and triangles on the four side is as follows :
![]()
Drawing Solids on a Flat Surface
The images are somewhat distorted, when we draw a solid shape, because our drawing surface is paper, which is flat. To make them appear three dimensional, there are two ways.
1. Oblique sketches
2. Isometric sketches
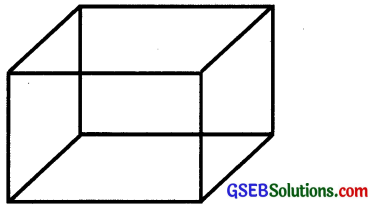
Oblique sketches: The oblique sketching is a pictorial representation of an object, such that the diagram is intended to depict the perspective of object in three dimensions. Following are the steps to draw oblique sketch of a cube.
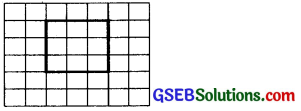
Step 1: Draw a square
Step 2
Draw a second square where the midpoints of two sides of both square concinde
Step 3
Join the corresponding vertices of both the squares
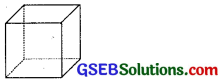
Step 4
Redraw using dotted lines for hidden edges
Similarly an oblique sketch of cuboid can be made. (Remember faces of cuboid are rectangles).
(ii) Isometric sketches. An Isometric sheet is a special sheet on which dots are formed a pattern of equilateral triangles. Measurement are kept proportional in an isometric sketch. Following are steps to draw isometric sketch of a cuboid having dimensions 4 × 3 × 2
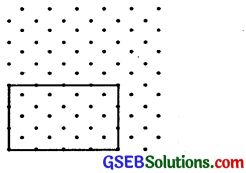
Step 1
Draw a rectangle to depict the front face
Step 2
Draw four parallel line segments of length starting from each of the four comers rectangle
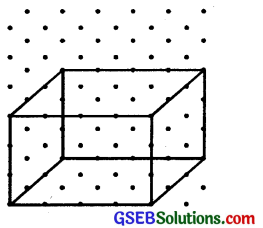
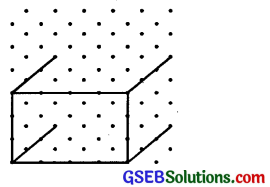
Step 3
Join the matching corners with an appropriate line segments
Step 4
This is an isometric sketch of a cuboid
Visualising Solid Objects
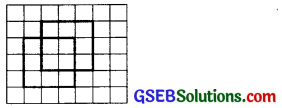
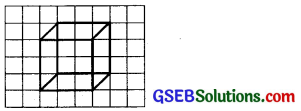
When we look at a solid object it is not necessary that the whole of it can be seen from one place. The view of the solid, also depend upon the direction from where it is seen. Thats why some combined shapes are viewed, some of the shapes remains hidden from the viewer. Visualising solid shapes is a very useful skill which help us to see the hidden parts of a solid shape.
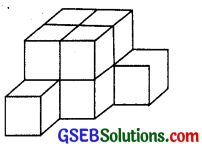
In the above combined shape how many cubes do you think have been used to make this structure ? The answer is this structure contains 10 cubes.
![]()
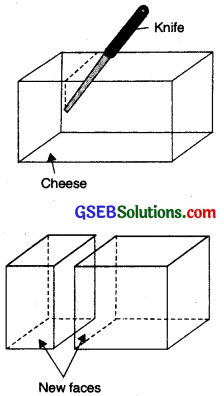
Viewing Different Sections of a Solid
Different ways of viewing a 3-D object are:
1. By Cutting or Slicing. A solid or a 3-D object can be cut into a number of parts. If we cut a 3-D object into two parts by using a knife, two new faces of solid is obtained. These new faces are called cross-sections of a solid. For example, If we cut a piece of cheese vertically we get two new faces as shown in figure.
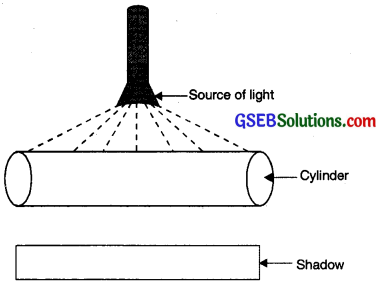
2. By Shadow of a 3-D object. The shadow of a 3-D object is a 2-D Image. The shadow of an object is not a fixed image because if we change the position of the source of light, the shadow of the object changes. For example, if we throw light on the cylinder from the top we get a shadow in the shape of a rectangle as shown ahead: ——Source of light